Shutter speed is a great tool for perfecting exposure, controlling blur, and creating interesting effects. Discover what it is and how to use it.
There is an opinion that in mastering photography, one should concentrate on developing creative skills, and not on studying the technical side. However, there are some important technical elements that you need to master in order to take good photographs. Exposure is one of those elements.
Shutter speed is one of three elements (along with aperture and ISO speed) that determine exposure. Exposure determines how bright your photo will turn out, and also allows you to add a lot of creative effectors to your photo. Let's take a look at what an excerpt is, why it's so important, and how you can use it.
The excerpt is important tool in photography and it needs to be studied.
What is exposure?
The camera shutter is a small shutter that sits directly in front of the sensor inside your camera. When you take a photo, this shutter opens and closes, as if letting in light, which affects the matrix, thereby forming an image. Shutter speed, i.e. Shutter speed is how fast the shutter opens and closes.
A fast shutter speed tells us that the shutter is opening for a short period of time; long exposure - for a long period.
How is exposure measured?
Shutter speed is measured in seconds or fractions of a second. For example, a shutter speed of 1/100 means 1/100th of a second, or 0.01 second. Shutter speed is also called exposure time, because shutter speed indicates the period of time during which the light acts on the matrix.
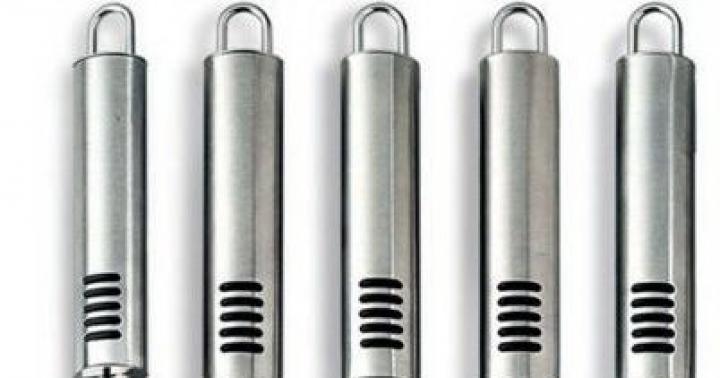
Most cameras have a wide range of shutter speeds, from one thousandth of a second to several seconds. SLR cameras (single lens reflex cameras) also have a 'Bulb' mode that will keep the shutter open for as long as you want.
Best exposure
AT automatic mode the camera tries to find the best shutter speed to capture the scene you want. Unfortunately, she doesn't always succeed, and photos can come out underexposed (dark) or blurry.
The best way out is to put the camera in manual mode and determine the shutter speed yourself, taking into account the following.
Camera shake
Camera shake occurs when you hold the camera in your hands. It doesn't matter if you think you're holding it steady, because perfect stability can't be achieved anyway. This results in blurry or fuzzy photos.
Handheld photography causes camera shake and motion blur.
You can compensate for camera shake by using a fast shutter speed. This is most noticeable when using lenses with longer focal lengths - the longer focal length, the faster the shutter speed should be to compensate for camera shake.
There is a rule according to which the slowest shutter speed should be equal to 1 / focal length of the lens. For example, for a 200 mm lens, you should use a shutter speed no slower than 1/200 sec. This takes into account the effective focal length of the lens, which is determined by multiplying the focal length by the crop factor of the camera.
motion blur
Motion blur happens when you photograph moving subjects such as a runner. If you use a slow shutter speed, the slider will move across the frame while the shutter is open, resulting in a blurry streak in the final image.

Use a fast shutter speed to eliminate blur, or use a slow shutter speed to capture movement more creatively.
You can eliminate blur from a photo by using a fast shutter speed. This will mean that the subject will move less while the shutter is open, thus reducing the blur effect. With a sufficiently fast shutter speed, the blur becomes invisible and the action seems to be “frozen”.
But before lowering the shutter speed, you should consider whether you really want to eliminate blur. After all, this is a great way to convey speed and movement. You can also take a panoramic shot, i.e. move the camera after the subject, keeping it in focus and blurring the background.
exposition
You also need to make sure you have installed correct exposure. A slower shutter speed lets in more light than a shorter shutter speed. The challenge is to choose a shutter speed that allows just the right amount of light to come in, so that the image is not too bright (overexposed) or too dark (underexposed) and all the important parts of the scene are adequately lit.

Choosing the right shutter speed is important to get a perfect exposure with good highlights and shadows.
But do not forget that exposure is not only shutter speed, but also aperture and ISO number. It's good practice to choose a shutter speed that produces the desired amount of blur (if needed) and then choose the appropriate aperture and ISO to get the correct exposure.
Creative Effects
By using very fast or very long exposures, you can achieve interesting creative effects.
Shooting at very slow shutter speeds (from a few seconds to several minutes) allows you to make, for example, the effect of blurry clouds, giving the effect of fog to moving water, or to get light trails from moving cars or stars.

Very slow shutter speeds are used for interesting abstract effects such as misty soft water.
Conversely, if you use a very fast shutter speed, you can "freeze" such beautiful movements as, for example, the flight of birds, an athlete during sports, or the splashing of water. It takes a lot of practice and learning to learn how to take these shots, but once the technique is mastered, the photos look amazing.

To freeze motion, use a very fast shutter speed.
The effects that can be obtained by varying the shutter speed are countless. Don't be afraid to experiment and use settings you have never used - you never know what will bring freshness to ordinary everyday objects.
The best way to learn shutter speed is to put your camera in manual or shutter priority mode and practice. Pay attention to how certain exposures affect the photo, what effects they bring to the image, and then use this experience to bring your photos to a whole new level of creativity.
Before reprinting articles from this site, please read the rules
Shooting at a slow shutter speed allows you to create interesting photographs, giving the photographer ample opportunities for creativity. This technique can be used in various shooting situations and for completely different purposes. Starting from shooting dynamic scenes and ending with photographing night landscapes. In this article, we'll talk about how to shoot long exposures correctly to get the best results.
When to use a slow shutter speed
First you need to decide what it is. As you know, shutter speed determines the time interval (in fractions of a second, seconds or minutes) during which the photosensitive sensor of the camera captures the image. Shutter speed is one of those parameters that, together with the sensitivity of the sensor, adjusts the brightness of the image. Conventionally, a slow shutter speed can be called a shutter speed of more than 1/10 second. This period of time is quite enough in a normal shooting situation for moving objects in the final photo image to turn out to be blurry. However, in practice, photographers operate with much longer shutter speeds to achieve the result they need. In what cases should you resort to using slow shutter speeds? A few of the most common situations can be briefly listed:
- Display dynamics in the picture
If you want to convey the dynamics of the movement of an object in a photograph, then you should use a slow shutter speed. This is true not only when shooting cars and other objects, but also when shooting a mountain river or a fast-moving stream. Moreover, the slower the object that you want to shoot moves, the greater the shutter speed should be chosen to convey the intensity of the movement.
- Eliminate dynamics

This is the reverse situation, where you need to set an even slower shutter speed. For example, if you want to get a calm water surface in the picture without small splashes and splashes, or you need fast-moving clouds in the sky to turn into a kind of snow sheet covering an urban settlement in the photo. By shooting at a slow shutter speed, you can blur the sea waves on the coast, turning them into a surreal mist. In addition, ultra-long exposure allows you to focus the viewer's attention on the main object, because the longer the exposure, the less unnecessary details will remain in the picture.
- Shooting in low light conditions
Of course, slow shutter speeds can be used for photography in low light conditions. When shooting at night or evening time often you have to slow down the shutter speed to get a better and brighter frame. But it's best if you use a flash or some other light source in the frame. Indeed, for a longer exposure time, you have the opportunity not only to highlight the desired object, but even create a kind of light pattern using a flashlight and other light sources.

Of course, the possibilities of using slow shutter speeds when shooting night landscapes are truly endless. Photographing moving cars at night looks very interesting. Thanks to this simple technique, you can create amazing artistic effects from the light of car headlights. The slower the shutter speed you set, the longer the light lines from the headlights will turn out in the picture.
These are the most common situations in which you may need to set your shutter speed to a slower one. Now let's dwell in more detail on what tools you need to use in such a survey and what you should pay close attention to.
- Choose the shooting conditions
Long exposure reception requires quite specific conditions shooting. This, in particular, can be the hours of sunrise or sunset, when the contrast in the clouds increases and the photos are very interesting. Naturally, it is good if there is any movement in the frame. The same clouds and wind can bring it into the frame. If you are shooting near a body of water, then it is very good to photograph at dusk, when natural light takes on a bluish tint. A cloudy day is perfect for landscape shots. In this case, neutral density filters can be used. On a sunny day, you can photograph architectural objects at slow shutter speeds. The main thing is that the sky with moving clouds is present in the frame. In general, try to slow down your shutter speed only where appropriate.
- Use a tripod, cable or remote control
When we're dealing with long exposures, getting quality shots of course requires a stable tripod with a sturdy construction. It is necessary that the camera remains completely still during the exposure. Here, any, even the slightest movement, can completely "kill" the frame. For landscape photography, choose a stable tripod with sufficient weight.
Use the cable release or remote control to eliminate any movement. Of course, you can simply limit yourself to the timer on the camera, however, a cable or remote control makes it possible to avoid the slightest shaking of the device during long exposures. When using a conventional timer (shutter delay), the shooting efficiency is greatly degraded and there is no way to catch the right moment in the frame. So if you're after some exceptional, interesting footage, it's best to actually get yourself a remote.
- Apply filters
Long exposures are a great reason to use filters. Neutral gray (ND) filter is a translucent glass. It is advisable to use such filters in daylight hours in order to somewhat reduce the light flux falling on the camera's matrix, and, thus, it would be possible to use long exposures more comfortably.
ND filters differ in the number of dimming steps by which the illumination of the scene is reduced. One step - the difference is twice the degree of illumination. Accordingly, neutral gray filters allow you to increase the exposure time of the frame. Today there are nine and ten-stop filters with which you can use 30-second shutter speeds even in sunny weather.
ND Gradient Filters are for a little different. Thanks to this filter, you can even out the brightness in the photo image. The need for this especially often appears when photographing landscapes. For example, when the sky in the frame is much brighter than objects on the ground. An ND gradient filter minimizes this difference, providing a smoother transition from light to shadow.
- Don't forget about camera settings and composition
Usually, nice photos, shot using slow shutter speeds, are characterized by minimalism and simplicity of composition. Long exposures make it possible to exclude unnecessary, unnecessary details from the frame, making the composition more concise and simple. That is what you should always strive for. By the way, because of this, black and white shots taken at slow shutter speeds often look more attractive than color ones. So in many shooting situations it makes sense to shoot monochrome still images.
In conditions of light deficiency or when using a very high density filter, you should forget about autofocus. In such situations, it is recommended to first determine the composition of the shot, then manually adjust the focus without using a filter, and only then carefully attach the filter to the camera. Then you just have to press the shutter button. Regarding the settings - it all depends on the effect you want to achieve. Use the shutter priority mode and gradually change the exposure time to see what the result will be. It is important to find the optimal shutter speed. You can start, for example, from one second and gradually increase the shutter speed. If you are using a wide aperture, then pay attention to the fact that the shutter speed is not too long. Otherwise, the picture will be overexposed.
It is best to use the RAW format. This will allow you to capture more details in dark and light areas of the frame, and will also make it possible to correct the white balance in post-processing. In addition, RAW photo images are easier to convert to monochrome footage for better results. Note that even at the lowest sensor sensitivity (ISO), when shooting at slow shutter speeds, noise may appear in the photo image. So post-processing of images with correction or elimination of imperfections becomes an almost mandatory procedure.
- Activate Bulb mode
When working with slow shutter speeds, it is advisable to resort to the Bulb mode, which is present in most modern devices. The fact is that in many DSLRs the shutter speed that can be used is limited to 30 seconds. Sometimes this is not enough. This is where the Bulb mode comes to the rescue, allowing you to hold the camera shutter open for as long as you need. The shutter speed is determined only by how long the shutter button is pressed. Of course, here you will definitely need a trigger cable. Thanks to this mode, you can take interesting shots with a shutter speed of several minutes. Such a very long exposure can be used, for example, to effectively blur the water element.
Shooting at slow shutter speeds will require more responsibility from you, attention to building a composition and camera settings. However, this is a very attractive area of photography, which, with the right approach, will allow you to create very unusual and vivid pictures.
Long exposure photography is one of my favorite things to do. This allows you to capture something that is different from 99% of the photos on the Internet, and also requires skills and suitable equipment.
To work with this type of photograph, you need to deliberately overestimate the exposure time. While fast shutter speeds capture the moment, slow shutter speeds blur motion, creating different effects depending on the subject.
At first, everything may seem complicated. Most frequently asked question, which arises for beginners: "Why do my long exposure photos come out white?" Fortunately, solving this problem is very easy. The first step is to get a better understanding of the exposure triangle. If you want to read in detail, click on the link, and within the framework of the article I will give a very short review. The exposure of a photo (that is, how bright or dark it is) is determined by three characteristics: ISO, aperture, and shutter speed.
Shutter speed controls how long the shutter stays open. For most regular photos exposure ranges from 1/60 to 1/500, and we (depending on the subject) will need values from 1/10 second to 5 seconds or even 20 minutes. (Many cameras can't shoot faster than 30 seconds without Bulb, so you'll have to use an external shutter button.) More light will reach the sensor, resulting in a brighter image. If the shutter is left open too long, the output can be just a white canvas. The first step in solving the problem is to adjust the other two vertices of the exposure triangle.
ISO adjusts the sensor's sensitivity to light. Although the technical side is difficult to explain, it is enough to know that higher ISO values mean a brighter picture. Therefore, when shooting with a slow shutter speed, try to set the minimum ISO. The threshold level of most cameras is 100. Some models can even work with ISO 64, and Fuji cameras do not allow you to select a value below 200.
The third face of the exposure triangle is the aperture. Its value is responsible for the diameter of the hole that transmits light. The larger the aperture value, the wider the aperture. However, it is known that the relative aperture of the lens is indicated in fractional form. So f/8 actually means 1/8. Thus, if the f-number k more, then the relative aperture becomes smaller, because 1/16 is several times smaller than 1/4. If your photos come out white when working with slow shutter speeds, try making the aperture ratio narrower by setting a smaller aperture. A good starting point is f/16 and the lowest ISO. Also keep in mind that a smaller aperture means more sharpness. If you need a shallow depth of field, you will have to resort to some other methods.
Okay, you've followed these tips but still haven't gotten an answer to your question. If you're shooting at the lowest ISO and small aperture, and the pictures are still bright, you'll have to resort to one of the following options.
First, shorten your exposure. Not every frame takes 20 seconds to expose. The desired effect can be obtained with 1/2 or even 1/8 s. However, this does not work for every situation. Sometimes there is too much light in the frame, but if you look at the examples below, you can see that some of them were taken with relatively fast (for this type of shooting) shutter speed.
If too much light is the problem, find a way to cut it down. For example, just try to photograph the same landscape in more dark time days. Instead of trying to shoot at noon, take it at sunset or even on a cloudy day. This is one of the reasons cloudy days are perfect for shooting waterfalls when you need to increase your shutter speed a bit.
In the end, there is a very useful tool for this kind of shooting - the neutral density filter. These are regular sunglasses for your lens. Different ND filters have different densities. My personal choice is the 10-stop filter, which allows you to increase the shutter speed by 10 stops. For general shooting in the afternoon, a shutter speed of 1/30 s, ISO 100 and f/16 is required. With this filter, I can take the same shot with a shutter speed of 30s. The most commonly produced are 6- and 3-stop filters. If you need one or two extra stops, you can use a round polarizer.
Once you've figured out how to shoot at slow shutter speeds and bought an ND filter, there are a lot of interesting ways to take advantage of it. Here are some of my favorite types of photography.
dreamy ocean scenery
Have you seen photos of the coastline, the waves of which are turned into a mystical fog? While a fast shutter speed will stop the waves, a slow shutter speed will blur their movement. The choice of shutter speed depends on the amount of light, the frequency of the waves, and the depth of the water. A good starting point is ISO 100, f/16 and 15s.


lakes
Ripples in the water often ruin photos of lakes. This problem is easily solved by resorting to a slow shutter speed, which completely softens the surface. My ND filter has often saved me from water ripples or boring sunsets. Exposure here depends entirely on how strong the waves are. The picture was taken at ISO 200 (the minimum threshold for Fuji cameras), f/16 and a shutter speed of 90 s.

When taking the photo below, the water was much calmer, so I used a faster shutter speed. Here are the camera settings I chose: ISO 200, f/18, 5 sec. If you look closely, you can see another difficulty when working with slow shutter speeds - the tree on the left side has become blurry due to the wind.

waterfalls
I think it was waterfalls that initially inspired me to try long exposure photography. I looked endlessly at photographs of silky smooth waterfalls and really wanted to understand how it was done. A big plus is that when shooting waterfalls, you don’t need too long a shutter speed. But it is important to determine what part of the movement you want to convey. It's very easy to get a waterfall that doesn't have any context. Sometimes this is useful, but usually I still try to make the waterfall not completely blurry.
I wanted to keep most of the movement of Panther Creek Falls, so I set these settings: ISO 200, f/18, 1/8 sec.

Due to the darkness of this canyon, I had no choice, so I had to sacrifice the expressiveness of the waterfall and photograph it at ISO 800, f/11, 8s.

In the example below, I deliberately omitted sharpening to give the waterfall the appearance of a long silk cascade. Camera settings were: ISO 200, f/16, 5s.

streaks of light
Another one of my favorite examples. Light streaks are red or yellow/white lines that appear in a photo due to the headlights of passing cars. Here, the shutter speed is determined by how fast the cars are going. This is quite easy to do if a certain light source passes through the frame and you just need to calculate the time it takes for it to do so. However, when there are more cars and lights in the frame, things get more complicated. Below I have given some examples showing the camera settings.
Here it took a long exposure, as two streams of cars were moving in different directions. It was necessary to capture the end of one light source and the beginning of another. ISO 200, f/18, 15 sec.

When shooting the Brandenburg Gate, I was lucky because the flow of cars was moving at the same time. I took this photo at ISO 200, f/16 and 2.5s.

The photo below was not easy to take, as there are many lines of traffic in the frame that needed to be captured. ISO 200, f/16, 45 sec.

If you need more inspiration, there are other ways to work with long exposures. Search the internet for examples and see how you can get amazing clouds, how to work with camera wiring, etc.
Long exposure photography is one of my favorite things to do. This allows you to capture something that is different from 99% of the photos on the Internet, and also requires skills and suitable equipment.
To work with this type of photograph, you need to deliberately overestimate the exposure time. While fast shutter speeds capture the moment, slow shutter speeds blur motion, creating different effects depending on the subject.
At first, everything may seem complicated. The most common question newbies have is “Why do my long exposure photos come out white?” Fortunately, solving this problem is very easy. The first step is to get a better understanding of the exposure triangle. If you want to read in detail, click on the link, and as part of the article I will give a very brief overview. The exposure of a photo (that is, how bright or dark it is) is determined by three characteristics: ISO, aperture, and shutter speed.
Shutter speed controls how long the shutter stays open. For most ordinary photographs, shutter speeds range from 1/60 to 1/500, and we (depending on the subject) will need values from 1/10 second to 5 seconds or even 20 minutes. (Many cameras can't shoot faster than 30 seconds without Bulb, so you'll have to use an external shutter button.) More light will reach the sensor, resulting in a brighter image. If the shutter is left open too long, the output can be just a white canvas. The first step in solving the problem is to adjust the other two vertices of the exposure triangle.
ISO adjusts the sensor's sensitivity to light. Although the technical side is difficult to explain, it is enough to know that higher ISO values mean a brighter picture. Therefore, when shooting with a slow shutter speed, try to set the minimum ISO. The threshold level of most cameras is 100. Some models can even work with ISO 64, and Fuji cameras do not allow you to select a value below 200.
The third face of the exposure triangle is the aperture. Its value is responsible for the diameter of the hole that transmits light. The larger the aperture value, the wider the aperture. However, it is known that the relative aperture of the lens is indicated in fractional form. So f/8 actually means 1/8. Thus, if the f-number k more, then the relative aperture becomes smaller, because 1/16 is several times smaller than 1/4. If your photos come out white when working with slow shutter speeds, try making the aperture ratio narrower by setting a smaller aperture. A good starting point is f/16 and the lowest ISO. Also keep in mind that a smaller aperture means more sharpness. If you need a shallow depth of field, you will have to resort to some other methods.
Okay, you've followed these tips but still haven't gotten an answer to your question. If you're shooting at the lowest ISO and small aperture, and the pictures are still bright, you'll have to resort to one of the following options.
First, shorten your exposure. Not every frame takes 20 seconds to expose. The desired effect can be obtained with 1/2 or even 1/8 s. However, this does not work for every situation. Sometimes there is too much light in the frame, but if you look at the examples below, you can see that some of them were taken with relatively fast (for this type of shooting) shutter speed.
If too much light is the problem, find a way to cut it down. For example, just try to photograph the same landscape at a darker time of day. Instead of trying to shoot at noon, take it at sunset or even on a cloudy day. This is one of the reasons cloudy days are perfect for shooting waterfalls when you need to increase your shutter speed a bit.
In the end, there is a very useful tool for this kind of shooting - the neutral density filter. These are regular sunglasses for your lens. Different ND filters have different densities. My personal choice is the 10-stop filter, which allows you to increase the shutter speed by 10 stops. For general shooting in the afternoon, a shutter speed of 1/30 s, ISO 100 and f/16 is required. With this filter, I can take the same shot with a shutter speed of 30s. The most commonly produced are 6- and 3-stop filters. If you need one or two extra stops, you can use a round polarizer.
Once you've figured out how to shoot at slow shutter speeds and bought an ND filter, there are a lot of interesting ways to take advantage of it. Here are some of my favorite types of photography.
dreamy ocean scenery
Have you seen photos of the coastline, the waves of which are turned into a mystical fog? While a fast shutter speed will stop the waves, a slow shutter speed will blur their movement. The choice of shutter speed depends on the amount of light, the frequency of the waves, and the depth of the water. A good starting point is ISO 100, f/16 and 15s.
lakes
Ripples in the water often ruin photos of lakes. This problem is easily solved by resorting to a slow shutter speed, which completely softens the surface. My ND filter has often saved me from water ripples or boring sunsets. Exposure here depends entirely on how strong the waves are. The picture was taken at ISO 200 (the minimum threshold for Fuji cameras), f/16 and a shutter speed of 90 s.
When taking the photo below, the water was much calmer, so I used a faster shutter speed. Here are the camera settings I chose: ISO 200, f/18, 5 sec. If you look closely, you can see another difficulty when working with slow shutter speeds - the tree on the left side has become blurry due to the wind.
waterfalls
I think it was waterfalls that initially inspired me to try long exposure photography. I looked endlessly at photographs of silky smooth waterfalls and really wanted to understand how it was done. A big plus is that when shooting waterfalls, you don’t need too long a shutter speed. But it is important to determine what part of the movement you want to convey. It's very easy to get a waterfall that doesn't have any context. Sometimes this is useful, but usually I still try to make the waterfall not completely blurry.
I wanted to keep most of the movement of Panther Creek Falls, so I set these settings: ISO 200, f/18, 1/8 sec.
Due to the darkness of this canyon, I had no choice, so I had to sacrifice the expressiveness of the waterfall and photograph it at ISO 800, f/11, 8s.
In the example below, I deliberately omitted sharpening to give the waterfall the appearance of a long silk cascade. Camera settings were: ISO 200, f/16, 5s.
streaks of light
Another one of my favorite examples. Light streaks are red or yellow/white lines that appear in a photo due to the headlights of passing cars. Here, the shutter speed is determined by how fast the cars are going. This is quite easy to do if a certain light source passes through the frame and you just need to calculate the time it takes for it to do so. However, when there are more cars and lights in the frame, things get more complicated. Below I have given some examples showing the camera settings.
Here it took a long exposure, as two streams of cars were moving in different directions. It was necessary to capture the end of one light source and the beginning of another. ISO 200, f/18, 15 sec.
When shooting the Brandenburg Gate, I was lucky because the flow of cars was moving at the same time. I took this photo at ISO 200, f/16 and 2.5s.
The photo below was not easy to take, as there are many lines of traffic in the frame that needed to be captured. ISO 200, f/16, 45 sec.
If you need more inspiration, there are other ways to work with long exposures. Search the internet for examples and see how you can get amazing clouds, how to work with camera wiring, etc.
by Thomas Larsen
Many photographers, especially beginners, neglect the possibilities offered by exposure control. Most often, the aperture is set, and the shutter speed is used only for compensation in order to obtain a normal exposure. In this little photography tutorial, we'll look at how you can use shutter speed to be creative and some of the mistakes photographers make when choosing shutter speeds.
You should always know what you are shooting, why you are doing it and what result you can expect.
Five classic camera shutter speeds

1. Freeze motion, or shoot 1/250s or faster
Using a fast shutter speed helps to get a fairly balanced shot, but makes the picture too static. Any movement in the frame will be frozen. You can fix this by trying to slightly tilt the camera to get a more dynamic photo composition. But the best option- use the technique of shooting with wiring, which we will write about later.

The faster the subject is moving, the faster the shutter speed should be. For example:
- fast moving cars or animals: 1/1000 s;
- mountain bikes or running people: 1/500s;
- waves: 1/250 s.
It should be remembered that individual parts of the object can move very quickly. A striking example of this is a helicopter. The fuselage itself can be frozen at shutter speeds and 1/250, but even 1/2000 may not be enough for the blades. Or, for example, when photographing a girl waving her hair to freeze the ends of her hair, it is also necessary to use shutter speeds of the order of 1/1000 or even less, while the model itself is moving relatively slowly.
How to solve the problem of "lubrication"?
You can take a lot of shots, but knowing the laws of physics and the features of recording frames on a memory card, they do it differently. First, about physics: if you throw the ball up, then when will it have the highest speed, and at what point is it the smallest? That's right - the largest when the ball just comes off the hand, and the smallest at the point where it stops to fly down, i.e. at the peak of its movement along an up-down flight path.
When shooting competitions, where, say, motorcyclists take off on a springboard, the most interesting point is the peak, which is also the "slowest" in terms of movement. Shooting as many frames as possible is not the best approach for solving the problem. At some point, the camera will simply stop to record everything on a USB flash drive, and in sports competitions, such a delay is fraught with the loss of the best frame.
Instead, use a series of 2-3 frames, but while the main subject is at the peak of his movement. This approach gives the photographer the best chance of getting the best images by allowing the camera enough time to record the frame onto the memory card without being blocked.
2. Shooting with wiring
When shooting with panning, when the movement of an object is tracked using the camera, the shutter speed plays very important role. It must be in the range from 1/15 to 1/250 s.

If you have a lot of time, then you can do calculations - what shutter speed is needed to shoot cars moving in a certain area, but in reality everything is a little simpler. If everything in the frame is too blurry, then you need to make the shutter speed shorter.

If the frame has frozen the movement of the car, then an increase in exposure time is required. And do not forget that 1/125 is a longer period of time than 1/250

For example, some of the quantities most commonly used by photographers are:
- fast moving cars, motorcycles or birds: 1/125 s;
- mountain bikes close to camera: 1/60s;
- mountain bikes, moving animals or human work: 1/30 s.

by Jamey Price 1/60
3. How to use long exposure
It is also called creative blur - 1/15 s to 1 s.

Here it is necessary to make a small technical digression and recall what a camera is. This is an image capture tool that allows you to imitate the human eye, the human gaze, to some extent. But having created this tool, a person began to receive unusual effects that are difficult to see in life. Our vision conditionally "does 25 frames" per second in normal lighting, and we are used to seeing the world as we see it. But the camera, due to the fact that it is different, can show us the world differently.
In particular, make a frame overlay () or, with a slightly longer shutter speed, show the blur of moving objects, turning them into a line.

A similar effect can be observed with the eyes, if in complete darkness you quickly turn a flashlight. A dark-adapted eye will perceive a moving spotlight as a line.
A slow shutter speed is used to take pictures of a waterfall, for example. Specialists in this case, of course, use manual settings and , but you can simply set the shutter priority mode (Tv) on the camera.
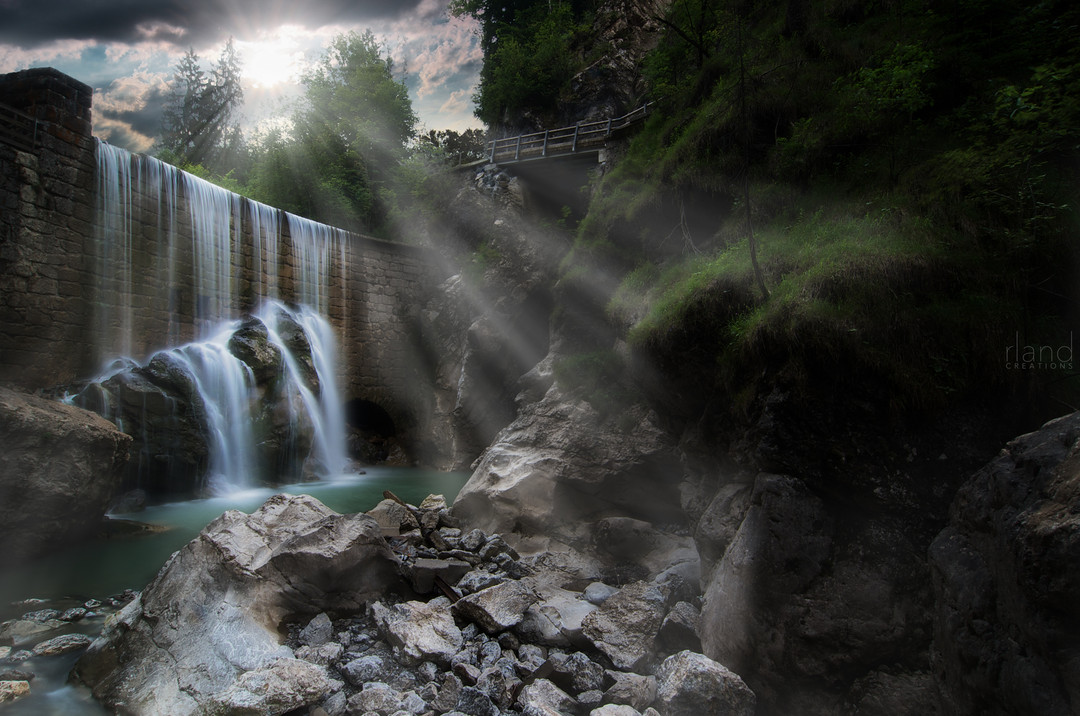
by Roland Maria, 3"
We offer some shutter speeds for motion blur:
- rapid flow of the waterfall: 1/8 s;
- people walking near the shooting point; waves; slow water movement: 1/4 s.
In bright conditions (on a sunny day), it may be difficult to obtain the required shutter speed (below 1/8 s), even by changing the aperture or at low ISO values. To reduce the amount of light, a Neutral Density (ND) filter is used, which is exactly what it is designed for. In ours, you can find variable density ND filters that reduce the amount of light passing through the lens to almost zero and can even turn a sunny day into night. Well, of course, when using slow shutter speeds, the use of or becomes mandatory.
4. Photo with shutter speed from 1 s to 30 s
There are processes that take a long time, and shutter speeds up to 1 second are no longer enough. These processes differ not only in time, they differ in perception. At shutter speeds from 1 to 30 seconds, all processes that proceed quickly are erased in the frame, only static remains ... soft static. It feels like the world is frozen. Movement disappears again. Only if at shutter speeds of 1/1000 the movement disappears, but a person sees an object that could move, then at a 30 second shutter speed they do not remain.

This effect can only be obtained when using a tripod. At the same time, it can no longer be light, marching, but a stable and heavy model is needed, since even a small wind will affect the image acquisition. Photographers often use a simple trick - they hang an additional load on a tripod, and most often this load in field conditions is a working photographic backpack. On most tripods, you can see a hook on the bottom for hanging the load and, accordingly, giving it more stability. Additionally, we recommend that you familiarize yourself with some other working techniques -.
Excerpts that photographers use to create these photos:
- wind stirring in the foliage of trees: 30 s;
- smooth movement of the sea surface: 15 s;
- fast moving clouds: 8 s;
- waves with some details preserved: 1 s.
If you're planning to shoot before sunrise or after sunset, be prepared for the light to change very quickly, so you'll need to change your aperture (or use a faster or slower shutter speed).
5. Shooting at night - shutter speed over 30 s
Shooting at night assumes that there is very little light. Accordingly, many photographers will want to increase the value, which most often leads to an increase in noise, when individual pixels begin to appear much brighter than the rest.

If you leave the ISO as low as possible and just set a slow shutter speed, this will lead to some reduction in image noise.
Most often, astrophotographers face similar problems - that is, people photographing the starry sky. In addition, with long exposures, due to the rotation of the Earth, an effect arises when the stars line up in a round dance.

In order to avoid this, special equatorial mounts (tripods for telescopes) are used, which allow compensating for the movement of the Earth.
For example, to capture the night sky, you might need next time excerpts:
- individual stars or full moon landscapes: 2 minutes;
- star tracks: 10 min.
Global debugging
Hand shake
In addition to the fact that the selected shutter speed should depend on the speed of the object and the amount of light, we remind you that shutter speed is also affected by such a phenomenon as blurring from natural hand trembling. The longer the focal length of the lens, the faster the shutter speed should be. You can roughly calculate as follows - the focal length in mm corresponds to the shutter speed in fractions of a second. That is, with a 50 mm lens you can shoot handheld at a shutter speed of at least 1/50 sec without fear of blurring (unless, of course, you are dancing at this time or riding a sightseeing bus), and for 200 mm it will already take 1/200 second.

Even a simple monopod allows you to increase shutter speed by 1-2 times. The photographer has the opportunity to shoot with longer shutter speeds. A good tripod allows you to take pictures at any shutter speed.
The exposure time is a quality indicator even at. According to the observations of professional portrait painters, at a shutter speed of 1/50, the portraits are "live". Longer shutter speeds show blur, while shorter shutter speeds make portraits look too frozen.
The inability to properly use the shutter speed of the camera will lead the novice photographer to stagnation in creative development. No need to be afraid to master the initially difficult to perceive. Ask questions, together we will look for answers from advanced and professional photographers.